Showing posts with label Tutorials. Show all posts

Saturday, January 26, 2013

Mason Jar Soap Dispenser...With Tutorial

I love mason jars! I grew up drinking out of them, and I still do today. They're cheap, they're versatile and they're so sturdy. My dish detergent dispenser has been driving me insane since about a week after I got it. I wan't ready to go back to just having a Dawn bottle on the sink, so I decided to try a different approach. A mason jar dispenser!


My old dispenser started leaking. I would have to wipe the outside of it almost daily, or it looked like this...
Gross!

This was a ridiculously easy project. It probably only took about 10 minutes.

Materials:
Mason jar with lid
Soap pump
Drill
Drill bit 
Dish soap

I used a 5/8 inch bit, but this will depend on the size and type of soap dispenser you use. 

 To make drilling easier, I put the lid on my mason jar

 This drill bit made the perfect sized hole.

Now that you have your hole, take the lid of to fill up your jar, replace the lid and stick your soap pump lid in the hole.
So far, I love this soap dispenser. Not only does it not leak, but it's SO much easier to fill up than my old one...and it's cute!

On a side note, Dawn Ultra Hand Renewal in Pomagranate Splash smells amazing! I usually just get the blue stuff, but I got this free with a coupon and I love it!

Thursday, January 24, 2013

Diaper Cake with Tutorial

I mentioned in a previous post (at least I think I did) that one of my friends is having triplets. Her baby shower was this past weekend. With 3 newborn little girls on the way, I knew she would be going through diapers like no other, so I wanted to get her some diapers. I didn't want to just roll into the baby shower with a box of diapers though. I decided to make her a diaper cake. There are so many fun ideas out there on Pinterest. I considered several others before going back to the cake. This was my inspiration:

Diaper Cake monkey jungle

She is doing a jungle theme, so when I saw this one, I knew I wanted to make something similar!

Materials:
- Lots of diapers (I used 86 newborn diapers)
- Lots of rubber bands (1 per diaper, and several more)
- A paper towel roll or toilet paper rolls taped together
- A round, cardboard cake base (mine was 12")
- Ribbon
- Your choice of baby items

Directions: 
First, I started by rolling the diapers and wrapping them individually with rubber bands to keep them closed. 
(Please ignore my desperate need for a manicure.)

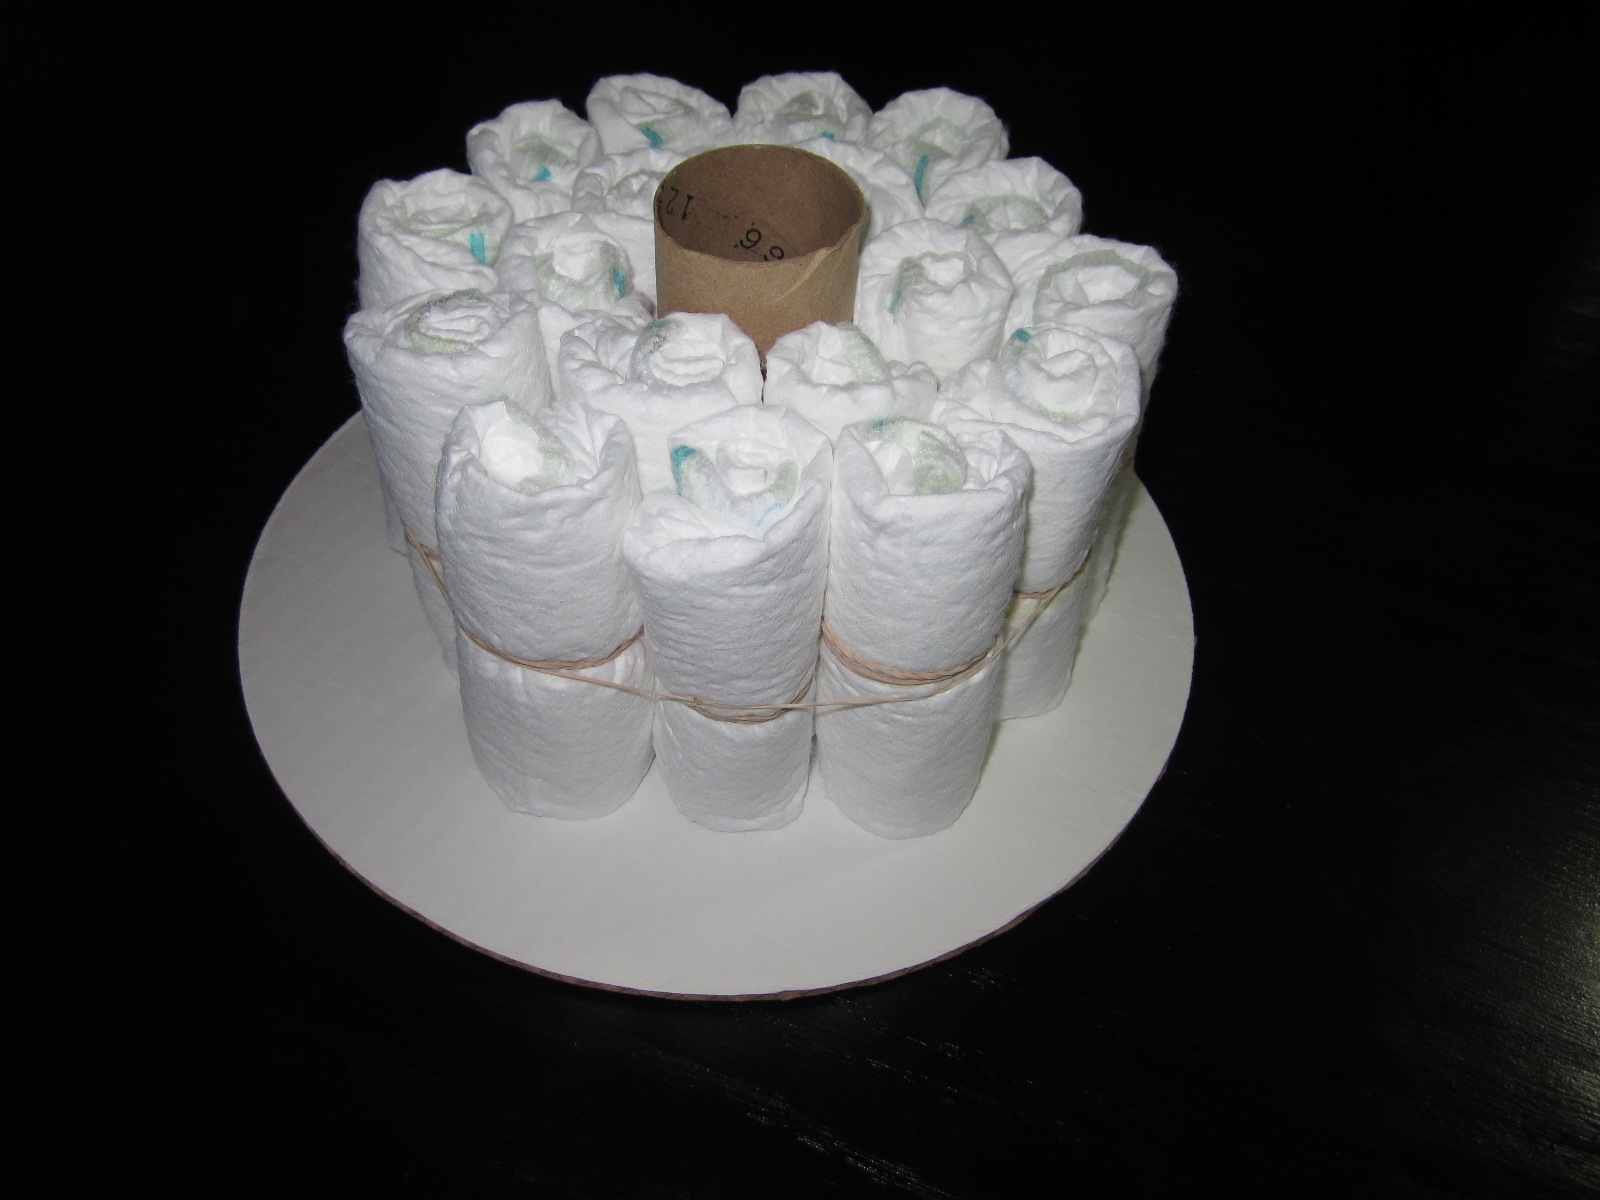
Using a rubber band to keep them in place, I placed diapers around the toilet paper rolls. Next, I put another rubber band around that row, and inserted more diapers to fill in another row. The bottom tier of the diaper cake has 4 rows of diapers. I repeated this process with 2 rows on the second tier and 1 row on the top tier. You could always keep going if you want a bigger cake, but I was out of diapers and the cake was slightly hanging over my cake base, so I called it quits. 
This is just 2 rows of the bottom tier.

The next thing I did is wrap ribbon around each tier to hide the rubber bands. For the top and bottom tiers, I just wrapped the ribbon around and secured it on the back side with double sided tape. For the middle tier, I tied the ribbon in a bow. Then, I started playing around with how I was going to place items around the cake. To keep them in place, I just used double sided adhesive dots, found at any craft store.

I had several items I needed to put on the cake. I had 6 teething toys, 6 washcloths, a set of 6 baby utensils (spoons and forks), Desitin and various bath items. I decided to make "lollipops" out of the washcloths and utensils. You can find the tutorial to those here.

The final product!

photo.JPG
Back View

I was originally going to make the palm tree and have 3 monkeys hanging from it. With the size and weight of the monkeys, it would have had to have been a pretty big tree and pretty sturdy. I thought it would look funny, so I skipped that part. I attached the other 2 monkeys to her diaper bag and filled it with lots of wipes, full sized bath items and hooded towels. I wish I would have thought to take a picture of these, but I didn't. In hindsight, I should have done the palm tree and just attached all 3 monkeys to the diaper bag. Either way, I'm still pleased with the way the cake turned out. It's super cute. 

Friday, January 11, 2013

Baby Washcloth "Lollipop" Tutorial

I have several friends and some family having babies this year. 6 to be exact. Yes, 6 babies in one year...and it's only January! Needless to say, I've been looking for ideas and trying to find creative ways to give gifts. I didn't want to just throw a bunch of baby supplies in a gift bag.

I saw this idea on Pinterest a while back and I just knew I had to make them for the next baby shower I was invited to. They are a very cute way of presenting a practical gift for any new mom. 

Materials: 
- baby washcloths
- baby spoons or forks
- ribbon
- tulle
- scissors

Directions:
Cut your tulle into squares. You will need one square per "lollipop" I did not measure mine, but they were approximately 6x6. 

Cut a piece of ribbon for each lollipop you will be making. I cut my to about 9-10".

Now, you're finished with your prep and you're ready to start. Fold a washcloth in half 3 times, until you have a long, narrow piece, like this.

Now, roll the washcloth up as tight as you can get it. It should look something like this.

Next, place the washcloth over the utensil. While holding it, wrap the tulle around the washcloth and utensil tightly. While holding it, tie a knot around the utensil using the ribbon. Finally, tie a bow with your ribbon and trim any excess. You're done! 


***You may find it easier to wrap a rubber band around the tulle first. I did not want to worry about having to hide the rubber bands and I wanted to use a thin ribbon, so I did not do this.*** 

I'm very pleased with how these turned out. What do you think?

Saturday, April 28, 2012

Composting on a Budget!

About a month or so ago, we started to think about composting. I wanted to use some compost in our garden and it was really hard for me to find. I thought it would be a good idea to try it for ourselves. Well, the compost bins I was finding were ridiculously expensive. I found out we could get them for free as residents of our county. I went out to the recycling center and picked one up. I thought it would be a small glorified trashcan or something. I was wrong. When they gave it to me it was a roll of plastic. You assemble it yourself and it turns out to be huge! It's about 3 1/2 ft in diameter and at least that tall. Way too big to go on our patio obviously. I gave it to my dad and we kind of gave up for a while. 

I had pretty much forgotten about our hopes to start composting when I was browsing one of my favorite DIY blogs one day. Then I found this post. I went to Target immediately after work to pick up one of these bins. I was totally up for a compost bin that costs less than $10! 

First, we drilled some holes in the lid of the bin.

Then, we drilled some holes in the bottom of the bin, so it can drain.

Then, we added some dirt, leaves, shredded newspaper and eggshells. It's fine to start with just the dirt and leaves and add as you go.

Fortunately, we still had a little bit of the compost we bought a while back. When we opened the bag, we noticed that there were lots of worms in it. They were actually still alive, so we threw that in there too! The worms will help speed the process.

This is the compost bin sitting out back. I know it's not pretty, but it doesn't look any worse than the grill!

...and it definitely looks better than this!

We've been adding all sorts of stuff to the compost bin and things seem to be going well so far. I just have to get into the habit of putting things that I used to throw away into the compost bin. I was really surprised at all of the things you can put in there. Like hair! Between Bailey and I, we produce a LOT of hair! We can also add dryer lint, paper, fruit and veggie scraps of course, tea bags, coffee, and lots more! You can't compost anything with fats in it, so no cooking oils, meat leftovers or dairy items...they can make smelly compost.

We've got a small container we keep under our kitchen sink to collect food scraps, paper towels, etc. Our tiny little pile is starting to grow, and I'm really looking forward to being able to use our own compost in our fall garden!


Thursday, March 22, 2012

DIY Starburst Mirror

I've been wanting a starburst mirror for quite some time now, but I haven't been able to accept the price tag on them. Not only that, but each one I see that I like, there's still a little something I would like to change about them.Here are a couple that I like.

$365  (+64.49 shipping) = $429.49- We're saving for living room furniture, and this is more than we're putting back each month. I'm obviously not dropping that much on a single mirror. Plus, there's just a little much going on for me here.

$69 (+10 shipping) = $79 - I like the way this one looks a lot better, but still, almost $80 for one piece,           more than I wanted to pay.

I started searching for tutorials and found this one pretty helpful. I did a few things differently, so I'll still provide a step by step.

Materials:
- A larger, round mirror (I used a 7 in. mirror from Michael's) - $4
- Smaller mirrors, mine range from 3/8" - 1" ( I got 2 mixed packs from Michael's and still have extra) - $4
- Wooden Skewers (I didn't even use half of them) - $2
- Metallic spray paint (I had some already, but you can find it for less than $5)
- Glue gun
- Glue sticks
- A piece of cardboard
* Picture hanging strips 
(I already had the last few items)

Total cost - $10 
(Prices are approximate. I bought the supplies several months ago and just got around to doing this project, and I took advantage of coupons.)

Even if you had to buy everything, you could still make this mirror for around $25, which is still much better than $80, and definitely better than $430!

Directions: 
1) Spray paint the skewers. I used a silver metallic spray paint. I tried to paint them flat, then roll them over once they were dry, but some of them just kept rolling back over. I had a random piece of styrofoam laying around and I just decided to stick them all in there and give them a couple coats. This way, I could spray all the way around at once. I wish I would have thought of this at first!
2) Glue on your painted skewers. I wanted my skewers to be different lengths outside the mirror, but I didn't want to take the time to cut them, so I basically made the "shortest" ones meet in the middle. I did draw some lines on the back of the mirror, but since I ended up using an odd number of skewers, I didn't use them. I just eyeballed it and made sure they were evenly spaced. Once these were in place and I was satisfied, I placed a skewer in between each skewer, I moved these closer to the outside of the mirror, so they appear to be longer than the first ones.
3) Glue over the back of the skewers. I did this because this thing would hurt if it fell on someone. Call me paranoid, but it would really suck. Honestly, going back, I think it would be plenty stable on its own and this just added to the bulk (I'll visit that issue later in the post.)
Before gluing on the mirrors.

4) Turn over and glue on your mirrors. I arranged mine in a pattern on the floor beforehand so I could get an idea of what it would look like. This is not necessary, but I'm a bit OCD about things like this and I needed a pattern. Haha.
Practicing my arrangement.

5) Glue over the backs of the little mirrors. This is just for a little extra stability.
6) Cover the back. I used cardboard for this, but I wish I had used something different. It's thick and it makes the mirror stick out from the wall to the point where it bothers me, and you can actually see the cardboard. Depending on where you're hanging your mirror, this may not be an issue. It's pretty high up on our tallest wall (close to the peak of the top floor), so you can just look up and see behind it. I want to try to use something thinner. If that doesn't help, this baby will have to find a newer home. This is where cutting the skewers short may have helped. I didn't want mine to stick out as far as the ones in the tutorial and I though this was easier than cutting several inches off each one.
Finished product!

Overall, I'm very happy with this mirror. Even if I can't find a way to resolve the cardboard issue (I'll post it if I do), I like it a lot and I think I can place it somewhere else in the house where it's not as noticeable. :-)


I know you can't see it as well in this picture, but you can tell how high up it is this way. I'm starting to think it's maybe a little too high up. I may move it down a few inches or so. What do you think? Any ideas on an alternate back so it doesn't stick out so far?

Here is the back of it now.